TryHackMe - Diskrupt
An underground research group, NexgEn e-Corps, has been working on a groundbreaking research paper on Quantum-Resistant Cryptography. The paper introduces a new encryption algorithm designed to resist quantum attacks. This research is a game-changer capable of securing global communications from quantum-powered adversaries.
Last night, the system sent an alert regarding the research paper being accessed from an unknown system on the network. The suspicion is on the newly joined intern Fatima, who has been seen around the research lab a few times.
She, being the insider with direct access to the laboratory resources, is suspected of stealing the research and attempting to erase all traces of her actions.
The forensics team has taken an image of her disk, but an unexpected system failure left behind fragments of critical evidence on her workstation and external storage devices.
 The lab has provided you with a forensic image of Fatima's workstation's hard drive. Your task is to :
- Fix the damaged disk.
- Examine the partitions.
- Find evidence of access to sensitive research documents.
- If any files were deleted or tampered with.
- What are the hidden files on the disk.
- Carve out important files deleted from the disk.
The lab has provided you with a forensic image of Fatima's workstation's hard drive. Your task is to :
- Fix the damaged disk.
- Examine the partitions.
- Find evidence of access to sensitive research documents.
- If any files were deleted or tampered with.
- What are the hidden files on the disk.
- Carve out important files deleted from the disk.
What are the corrupted bytes in the boot sector that caused the disk to be damaged?

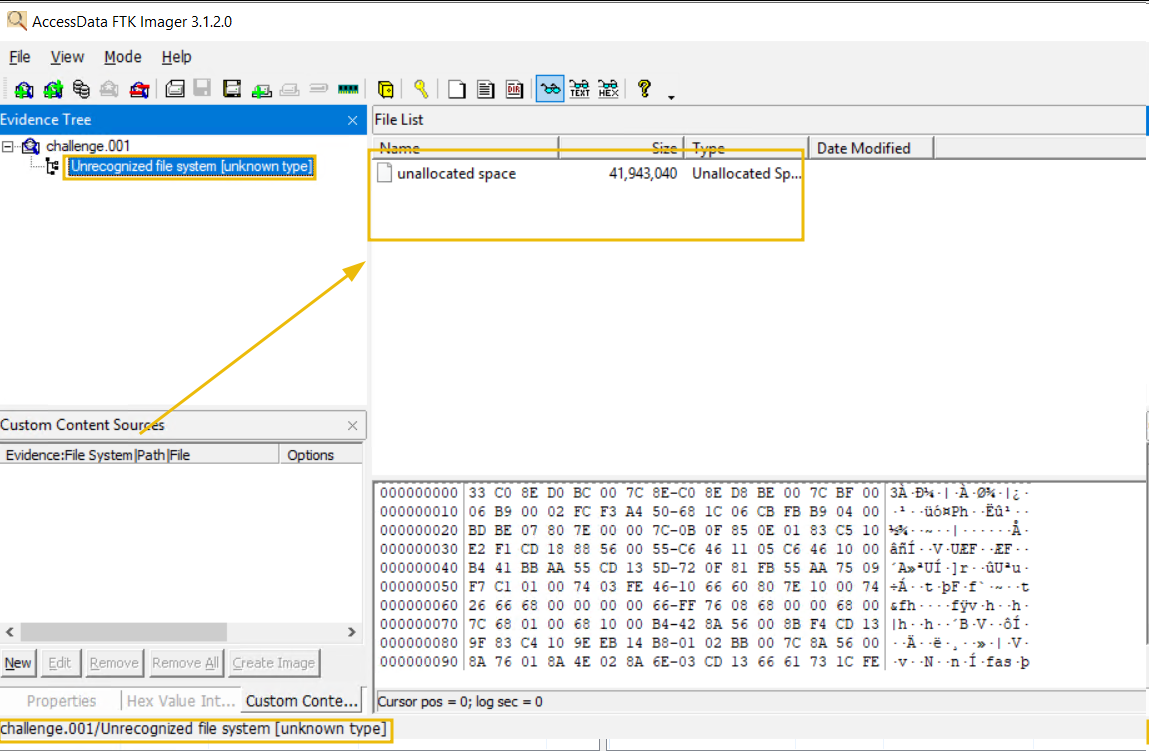
After started the machine, we can see our evidence inside "Evidence" folder on the desktop and also FTK Imager and Autopsy icons as a tool for Disk image then we also have HxD as hexeditor and EZ Tools in case we need to parse some artifacts.
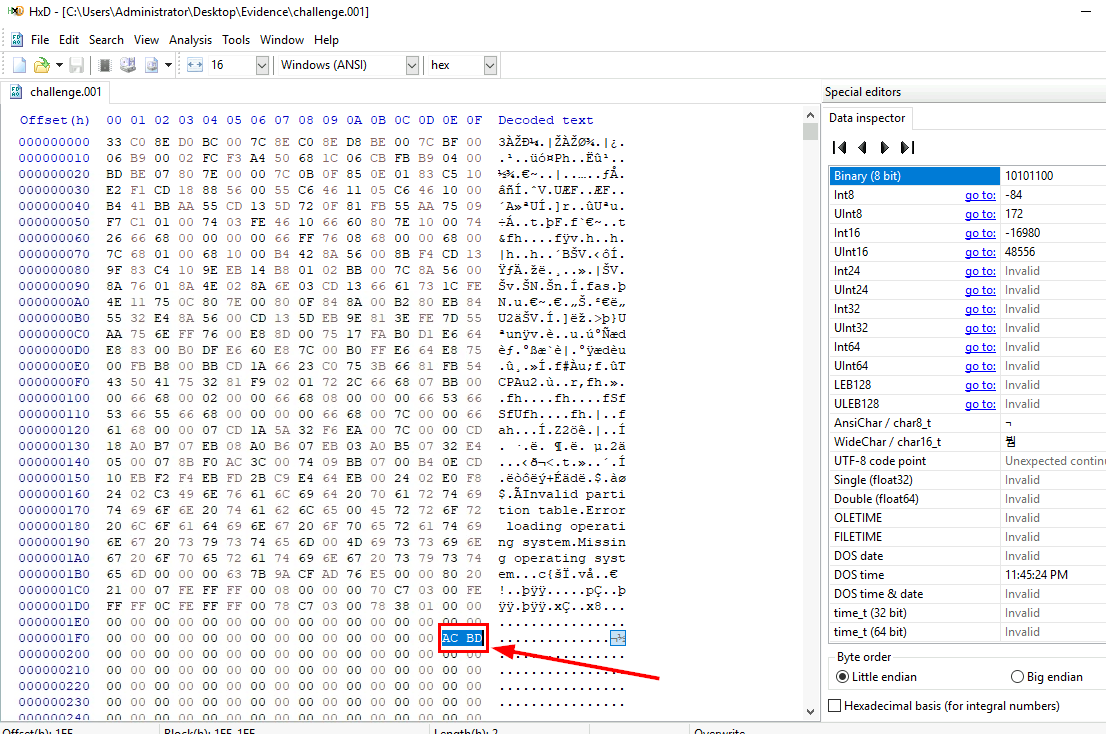
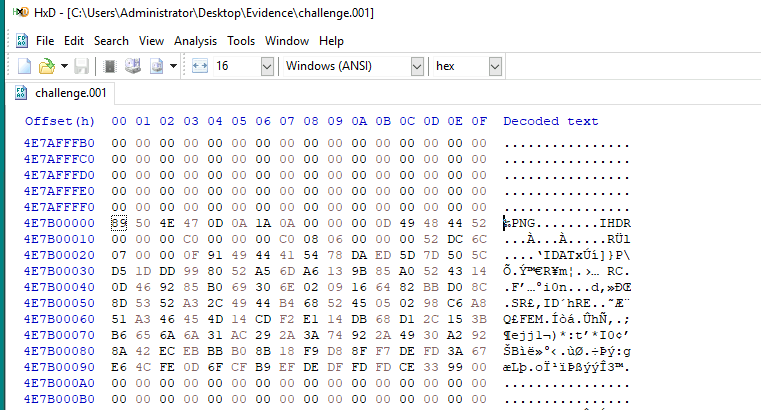
Since we already know that we got the correct disk image, then we can use HxD to open disk image which we can see that at 0x01FE and 0x01FF, instead of 55 AA which is the Boot signature of Master Boot Record (MBR), we got AC BD instead so this is why FTK Imager does not catch this disk image.
ACBD
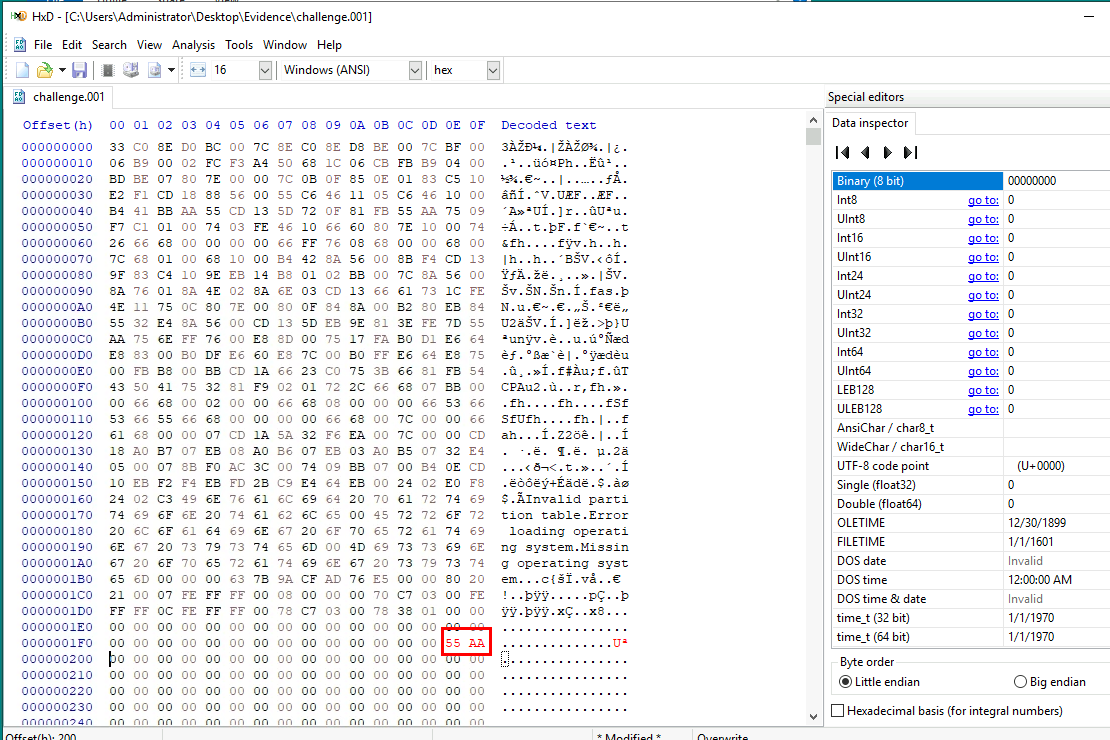
Now we can fix it and save the disk image.

Now FTK Imager finally recognized this disk image and properly read the disk partition and all the files inside the disk image.
Beside this, you can start import the image to Autopsy as well since we will need it to automatically craved file for us for the last question.
What are the bytes representing the total sector of the second partition? (Little Endian)
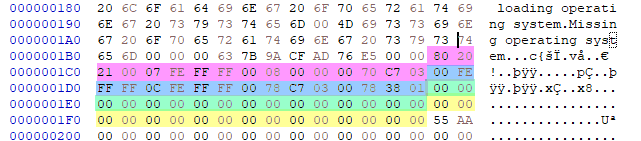
We know that there are 2 partitions on this disk image from the FTK imager but we could also see this from FTK imager as well so here is the position of each partition on Hex editor - 0x01BE first partition - 0x01CE second partition - 0x01DE third partition (blank mean it does not exist) - 0x01EE forth partition (blank mean it does not exist neither)
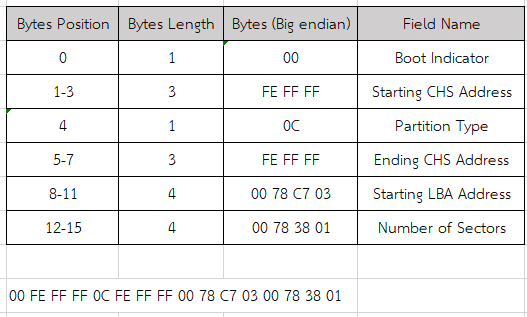
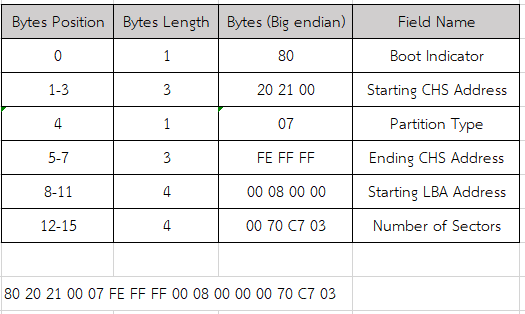
So we can copy bytes that represent second partition and separate to table like this then we can see the total of section of second partition from byte 12-15 for this line and we have to switch position a little bit to make it little-endian.
0x01387800
What is the size of the first partition in GB? (up to 2 decimals e.g: 15.25)
Its time for the first partition, we will have to multiply number of section with sector size (normally 512 bytes) to get the size of this partition.
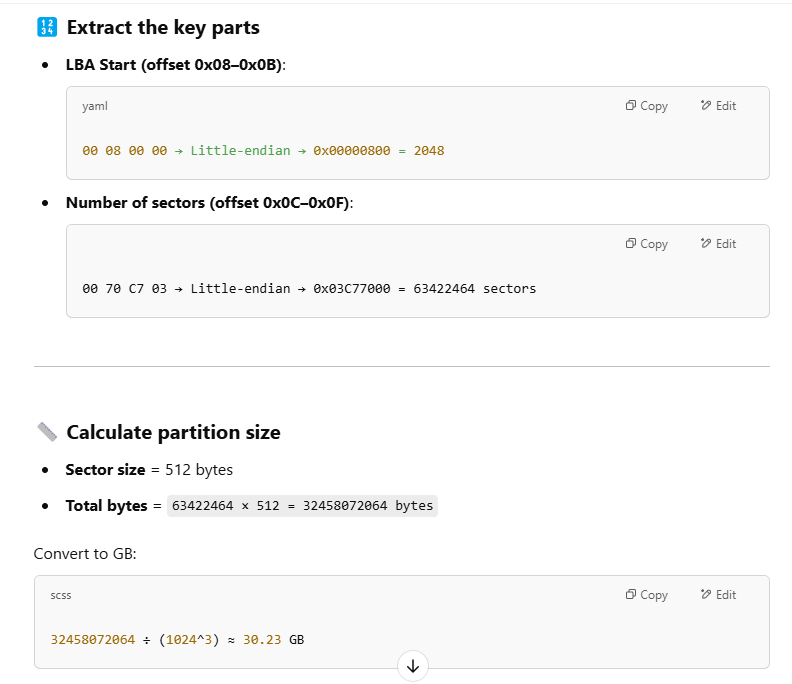
But I had a better idea, I let ChatGPT did the work for me which I told it to convert total bytes to GB as well.
30.23
What is the size of the second partition in GB? (up to 2 decimals e.g: 15.25)
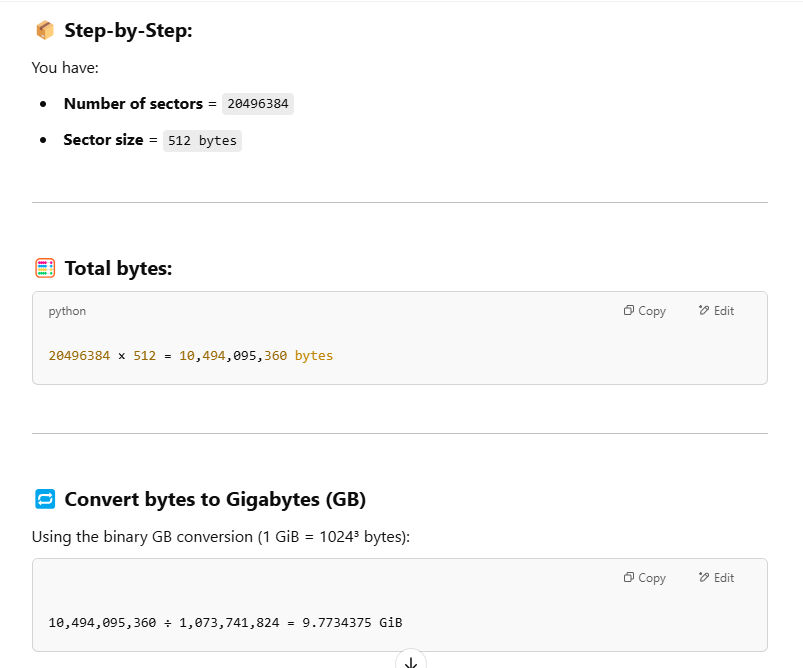
This time we got 9.77 has the size of second partition but the correct answer is 9.76 for some reasons.
9.76
In the NTFS partition, when was the text file related to the password created on the system?
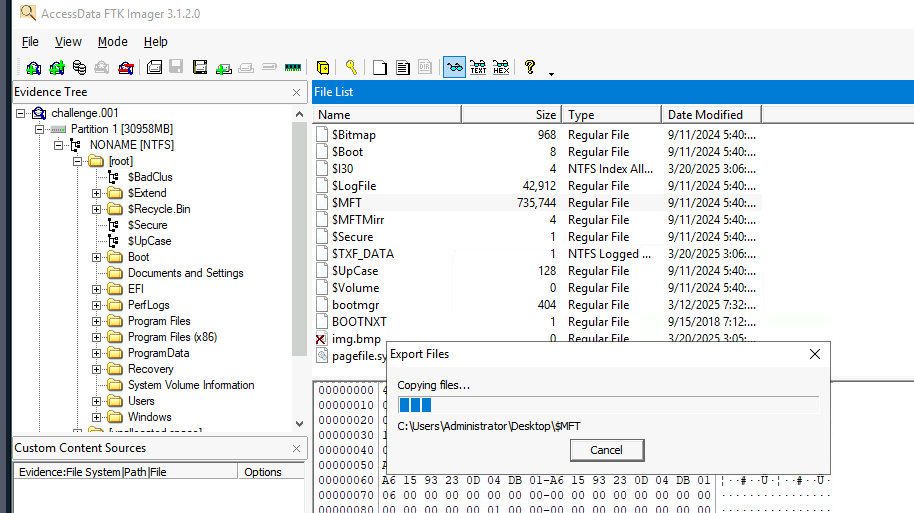
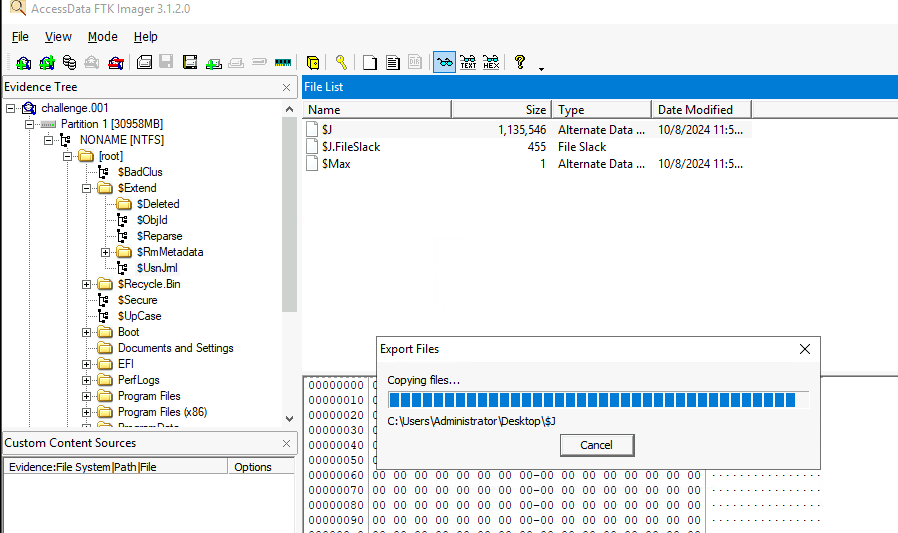
First, I exported Master File Table (MFT) from the table along with Usn Journal since both file stores record of files and their changes.
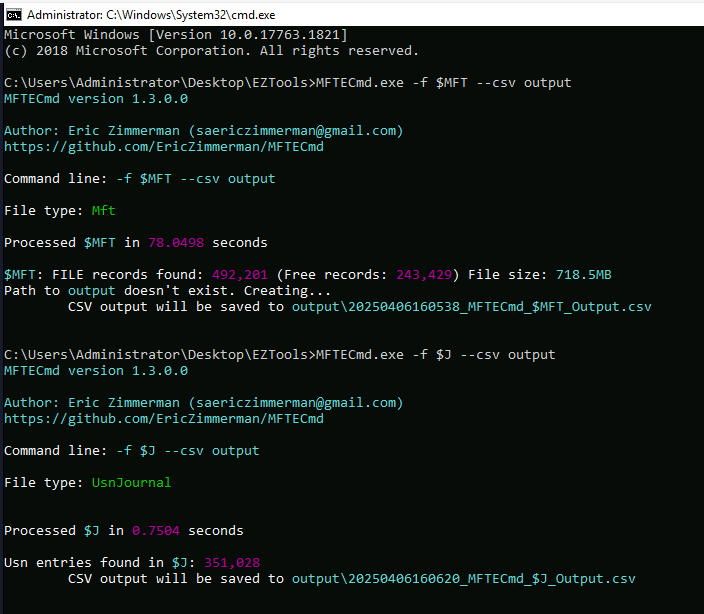
Then I parsed both file with MFTECmd.exe -f $MFT --csv output and MFTECmd.exe -f $J --csv output to get a nicely csv file that can be opened with Timeline Explorer, our favorite tool.
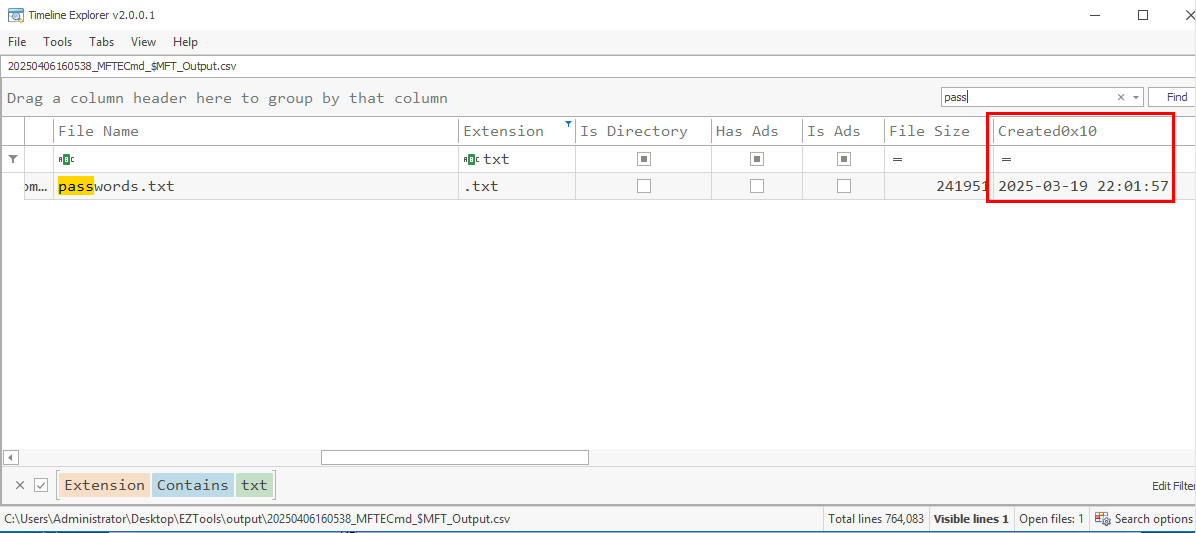
Then I started by looking at MFT record which reveals that passwords.txt which is the file we are looking for, was created on 2025-03-19 22:01:57.
2025-03-19 22:01:57
What is the full name of the sensitive pdf document accessed on this disk?
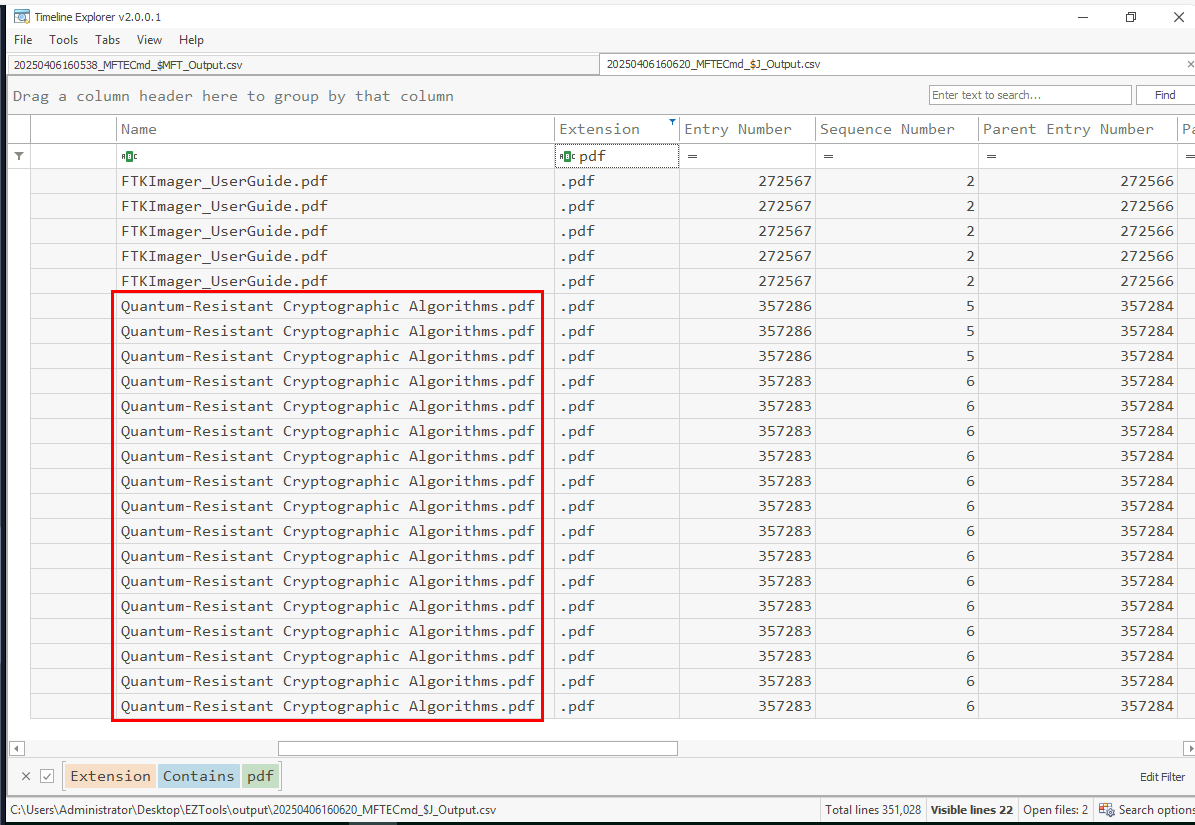
I could not find any PDF file that resemble the answer format so I shifted my focus on Usn Journal and to my surprised! there are some records regarding of the pdf file that matches the answer format from Usn Journal and it just happened to be the one that we are looking for as well.
Quantum-Resistant Cryptographic Algorithms.pdf
When this file was first found on this disk?
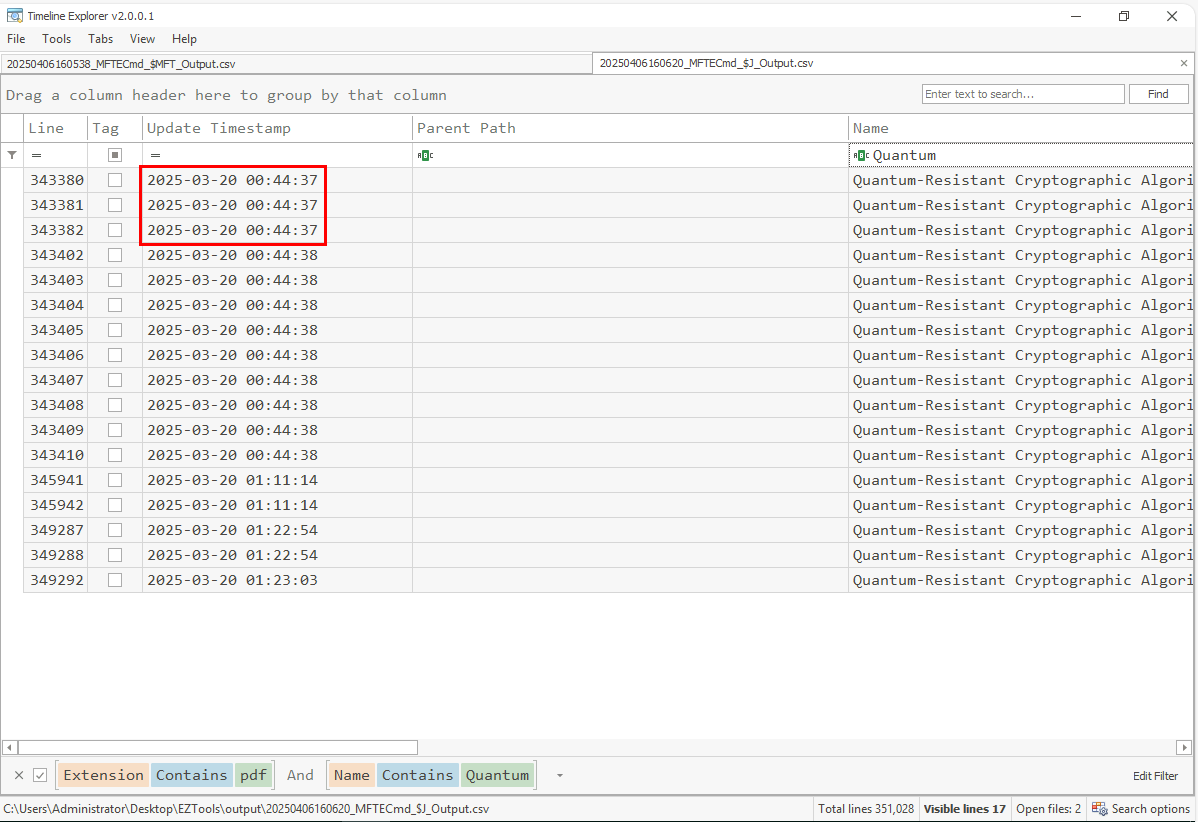
So we can take a look at the earliest Update Timestamp which is the timestamp that recorded the first appearance of this file this system.
2025-03-20 00:44:37
What is the entry number of the directory in the Journal that was created and then deleted for exfiltration purposes on the disk?
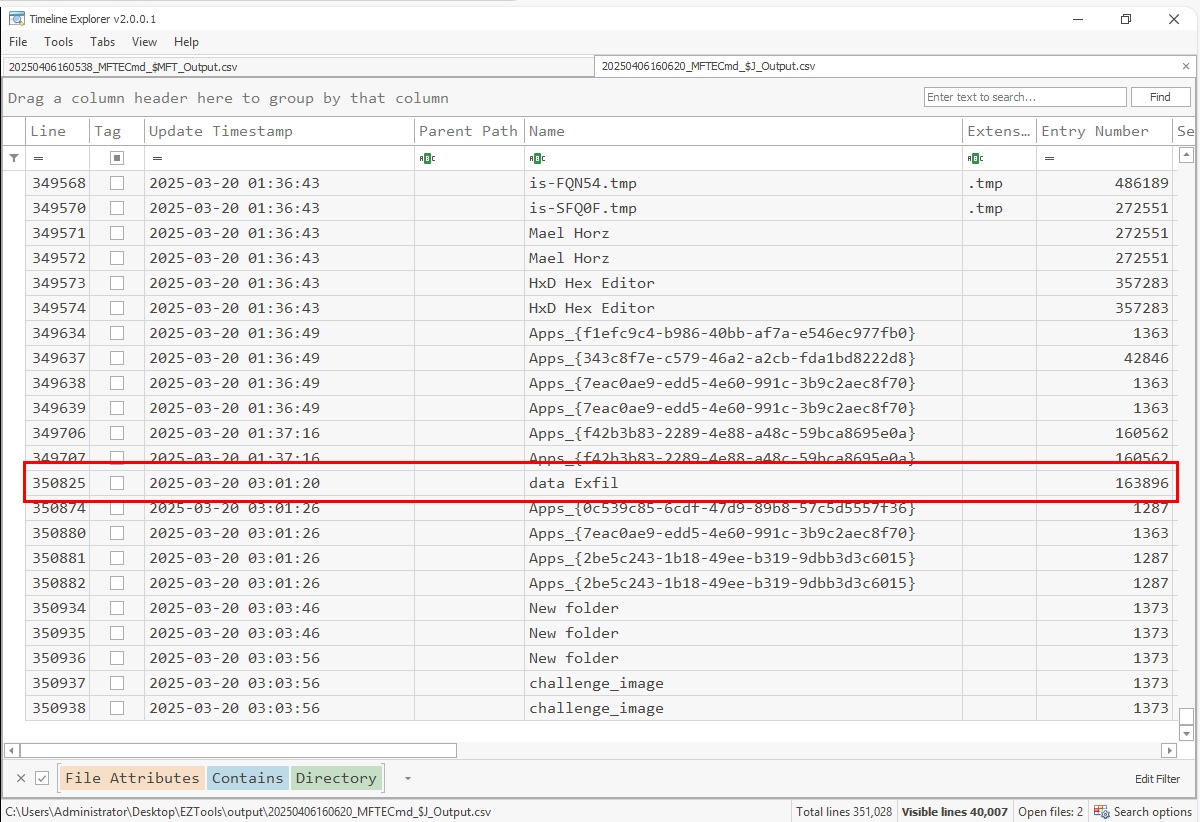
After filter for the Directory as File Attribute, I found the data exfil is the one that really stand out as its name imply so I grabbed its entry number and submitted as the correct answer.
163896
What is the starting offset of the first zip file found after the offset 4E7B00000?

Now its time for manual file craving via Hex Editor, I started by going to "Search" -> "Go to..." feature which I putted the offset that I want to jump to which will lead me to the offset 4E7B0000 and start to hunt from there as my starting point.
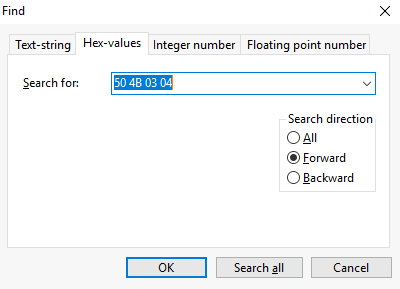
Now I went to "Search" -> "Find..." to filter for Zip file header (50 4B 03 04) and select the Search direction to "Forward" which should get us to the closest zip file behind the offset 4E7B00000.
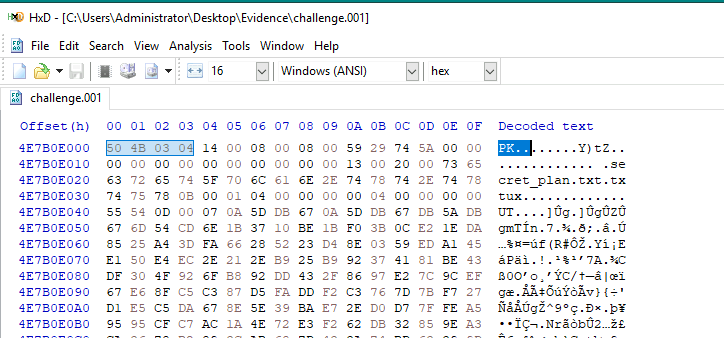
Which we found the zip file that contains secret plan text file right here.
4E7B0E000
What is the ending offset of the zip file?
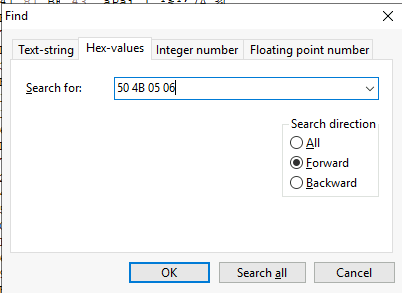
Now we are going to find the End of central directory record (EOCD) which has the signature = 50 4B 05 06 as shown in the image above.
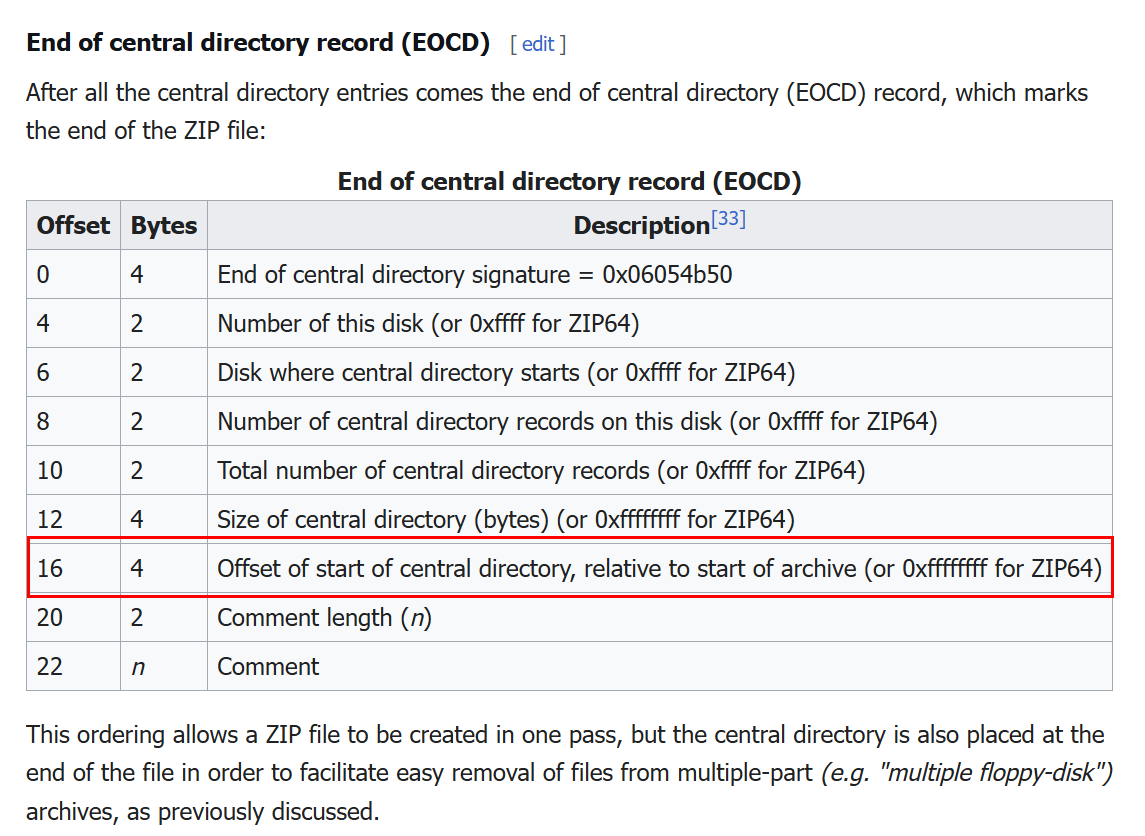
But the offset 06 will not be the correct answer since there are many things following this signature as shown in the image above.
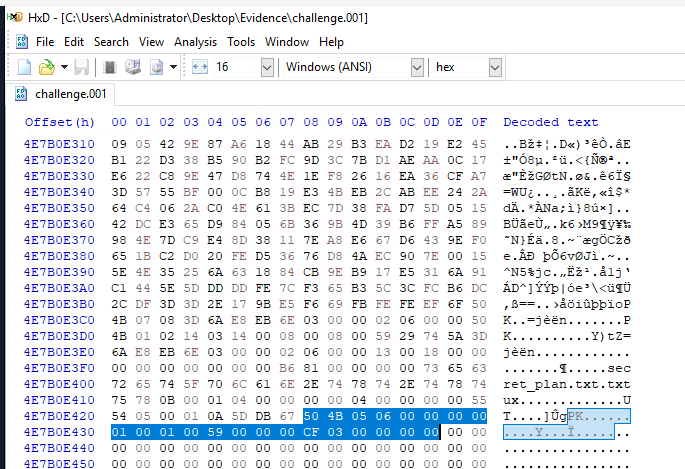
Noticed that I putted the red rectangle around the 16th offset and thats is the correct offset that we will have to append to get the correct answer of this question.
4E7B0E43D
What is the flag hidden within the file inside the zip file?
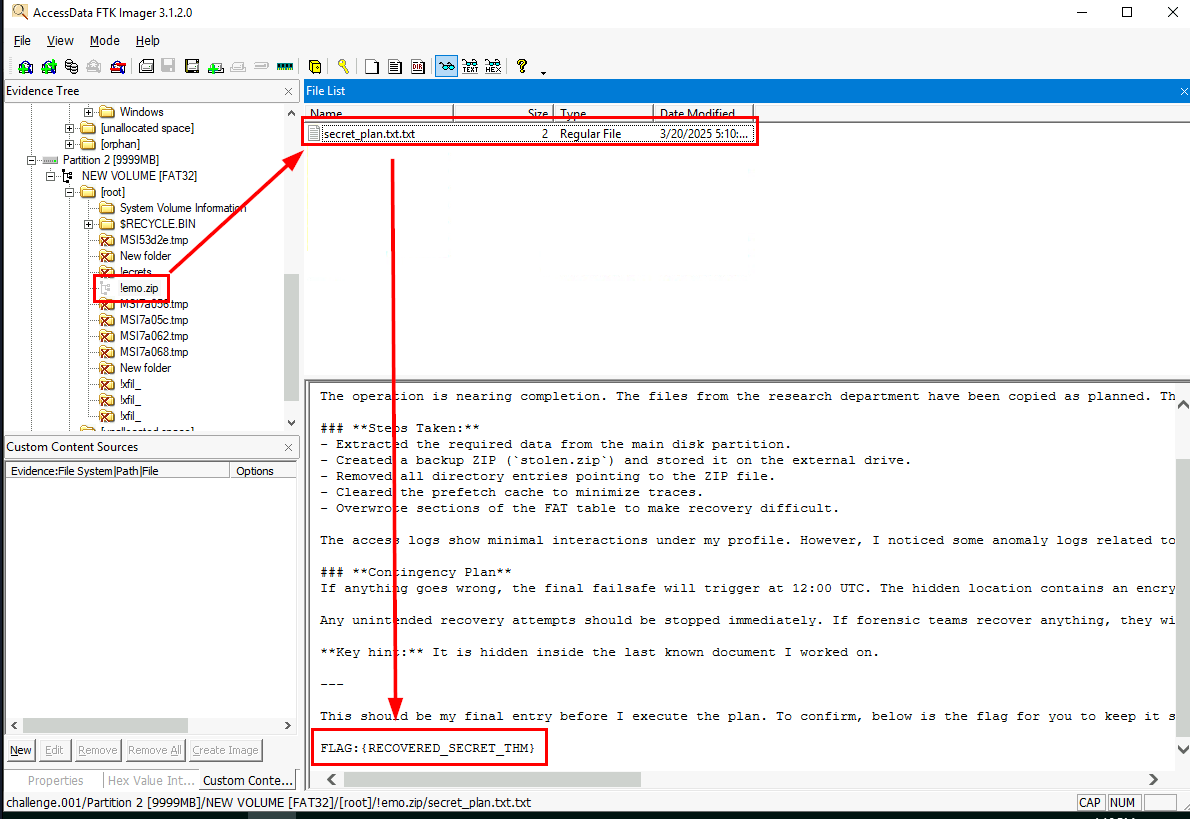
I noticed that the file might be in FAT32 partition so I tested my luck by going to it on FTK Image and to my surprise! we can get a file of the file inside the zip file this way as well!
FLAG:{RECOVERED_SECRET_THM}
In the FAT32 partition, a tool related to the disk wiping was installed and then deleted. Can you find the name of that executable?
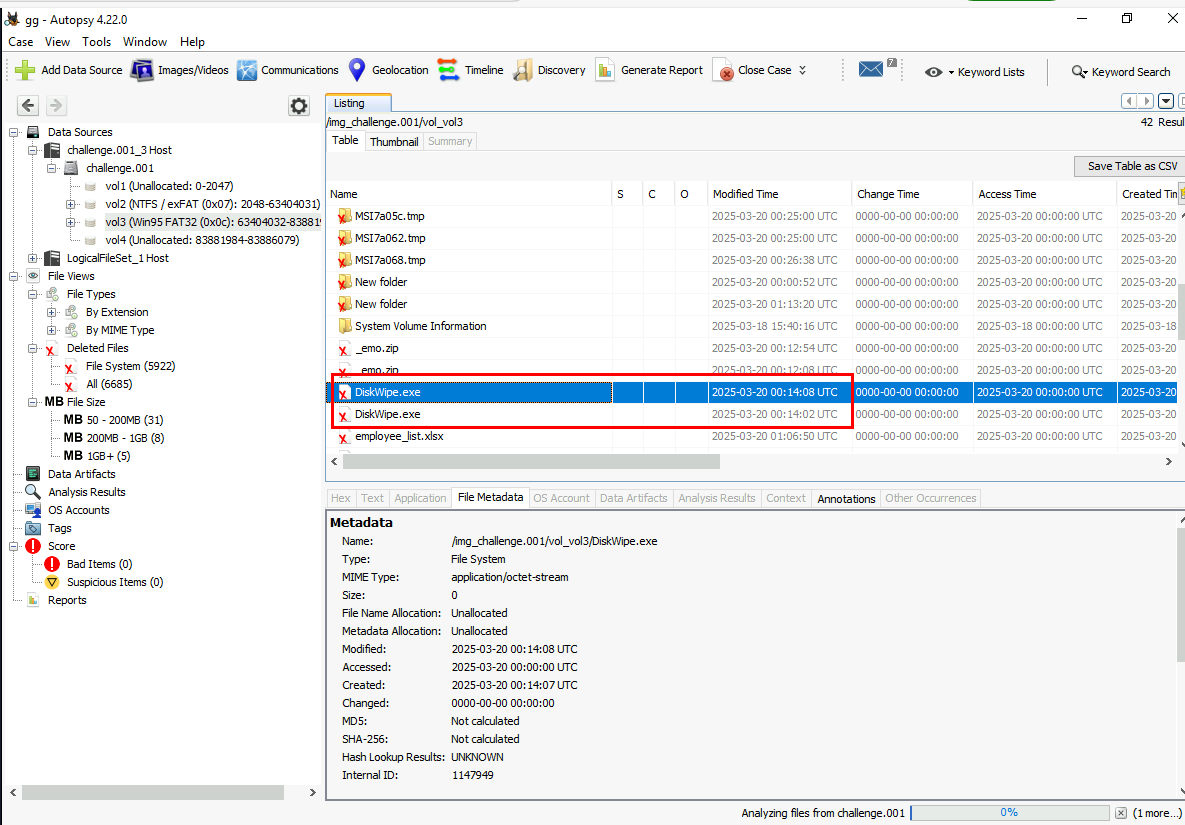
I hope your Autopsy already finished ingesting because its time to use it! and we can see that it actually catches the deleted executable from the FAT32 partition and this executable is the correct answer of this question.
Diskwipe.exe
And now we are done!